Black Bean Chili

This winter has been especially cold and rainy. During times like these, I gravitate towards noodle soups or just soups in general, stews, and chilis. You know, the comforting stuff! I found this particular recipe in a Cooking Light magazine, which is extra points in my book. Yummy AND “light”? YAAAAAAS.

20170207_190008

I made some tweaks to the recipe, but nothing substantial. I like my chili thicker so I eliminated the water. Also swapped one can of black beans for one can of diced tomatoes because tomatoes > beans. I mean, I know this is called black bean chili, but come on, FOUR cans of black beans?! WHY?

Oh, and a word of caution… When I first made this chili, I interpreted “3 canned chipotle chilis in adobo sauce” as 3 cans of chipotle chilis instead of 3 chipotle chilis. Oops. Don’t make the same mistake as I did. I love spicy foods but that was almost unbearable! I use 1 can now 😊

Pho Is Life

For as much Vietnamese food I consume, I must have been Vietnamese in my past life.

When I was with H, we ate pho almost every weekend.

T, who is Vietnamese, expanded my Vietnamese food horizons. Thanks to his sister, I was lucky enough to have home cooked Vietnamese food basically everyday. And family events on the weekend? Food. Heaven.

Now, with CT, my Vietnamese food cravings are as strong as ever. And though he’s very supportive, it’s usually just me in SD, so it’s up to me to satisfy my own cravings.

So what’s a girl to do? Make her own pho of course. In her instant pot.

20161216_185349

20161216_192328

Tadaaaa

20161216_225014

Yaaaaaas. Happy tummy.

Chapaguri

20160613_191309

Chapagetti + Neoguri = Chapaguri

20160613_200252

This is really a thing. Seriously!

I already love Neoguri. It’s been a favorite of mine since college. That and Shin Ramyun Black. Add egg, obviously. I’ve never had Chapagetti though, but I love jjajamyun so I would assume that I would love Chapagetti by itself as well. Chapagetti and Neoguri combined is basically spicy jjajamyun. Genius, right? And delicious, of course!

Spaghetti Cacio e Pepe

I love Chrissy Teigen. So when her cookbook, Cravings, came out, I immediately got myself a copyLemony Arugula Spaghetti Cacio e Pepe was the first recipe I tried because, pasta. And cheese. It truly is SO simple, yet SO delushious, as Chrissy would say. The acidity of the lemon juice and bitterness of the arugula help cut the richness of the dish. It isn’t diet friendly (don’t expect her cookbook to be), but I honestly did not feel bad eating it!

image

Double Fakeout

Ever since I broke out my vegetable spiraler, I’ve been kind of obsessed with zoodles. I’ve made it for lunch numerous times, all with red meat sauce. Buuuttt, I’m really not supposed to have tomato based sauces since, ya know, that acid reflux thing. I’d like to say I’m a “fuck it, I do what I want” kind of person, but in this case, heartburn is a real bitch and something I’d like to not experience frequently. So, of course I was super excited to find a healthy recipe on Instagram that would allow me to have my beloved zoodles without the burn!

2014-09-27 11.20.24 1
Creamy Chicken Zoodles

The sauce is just mashed avocado mixed with almond milk and pinch of salt and pepper. If you wanna kick things up a notch, add red pepper flakes and Sriracha.

Banana Pancakes

In my almost 30 years of existence, I’ve only made pancakes twice. The first was for an ex, who I was trying to surprise with breakfast in bed. I forgot the occasion (valentine’s birthiversary or whatever), but it doesn’t matter because the pancakes were terrible. Just God awful. Needless to say, I didn’t exactly rush to try again.

As I browsed the internet for breakfast recipes last week, I came across a recipe for flourless pancakes. And the best part? Only 2 ingredients: eggs and a banana! Sold!

2014-09-21 02.01.04 1
My 2nd attempt…TADAAAAA!

Ok, so I did tweak the recipe a bit. I added powdered peanut butter and ground cinnamon into the “batter” and then opted to smear TJ Speculoos & Cocoa Swirl instead of light butter. Can’t make it too healthy, ya know?

Tupperware Tuesday: Not Just Lunch

Tupperware Tuesday, a real look at the food I make each week. No fancy cameras, no lightbox contraption, no perfect angles. Just what’s for lunch.


OK, I know. Bringing breakfast, lunch, and dinner? I should just blow up an air mattress and sleep here! Seriously.

Last week, I attempted to do Whole 30, but failed miserably due to poor planning. When you’ve lived your whole life in non-compliance, it’s hard to turn that around in one day. But that’s my problem, I guess. I commit to things too easily and without much thought.

So instead of Whole 30, I browsed the internet for Paleo-friendly meals…

2014-07-15 12.41.48 1


Breakfast: Sweet Potato, Apple and Pancetta Bacon Hash (Whole 30 approved!)

20140715_125147


Lunch: Zoodles with Meatballs

I finally broke out my Paderno Spiral Vegetable Slicer. Yes, it’s been 10 months… This baby is seriously the best thing EVER! SO easy to use. SO easy to clean. And the best part is, I don’t even miss REAL pasta!

20140715_172436


Dinner: Pork Loin and Butternut Squash Stew

OK, I know the stew looks like shit, but let me assure you, it is delicious! And it tasted better the next day after reheating. This pretty much applies to all stews. It’s basically science (and good eats!). Alton Brown said so.

Another Try

I don’t consider myself a picky eater, but there are certain foods I will not eat.

Celery. Cilantro. Peas.
Yuck. Yuck. Yuck.

And for the longest time, avocados were the list. Why? I’m really not sure. I just… didn’t like them!

Call it a maturing palate, reevaluation of life, whatever, but in this past year, I seem to have forgotten my dislike of avocados. I ordered a salad with avocado. Not bad. I ate poke with avocado. Pretty good. Now I’m adding avocados to breakfast, lunch, and dinner! Love!

Unlike celery and cilantro, avocados don’t have a strong flavor; they won’t overpower a dish, ever. The creamy texture provides a richness that is a perfect substitute for butter and mayo. I guess you can say the same for peas, but I’m not ready for that yet. Baby steps…

2014-07-12 12.27.34 1My usual Saturday mornings… avocado toast, Stumptown cold coffee brew, and reading

Back in the Kitchen

Since I’m not driving to LA every weekend, I have time to cook. Like real food, guys!

I’m still cooking for the week, but it’s so much easier now cooking for one instead of two. And THANK GOD for the dishwasher! The one downside is my tiny kitchen, but hey, I’m used to having no counter space.

Here are some meals I’ve made in the past few weeks:

2014-06-24_05-05-04Chicken Marsala

2014-06-24_05-15-01Enchilada Chicken Stew

2014-06-24_05-21-34Country Style Pork Ribs

And here’s me trying to get fancy…

2014-06-24_05-28-12Roasted Pork Tenderloin, Polenta, Nectarines, Collard Greens, Balsamic Reduction

This dish was inspired by a friend from college who is actually a chef, unlike myself. She posted a picture and I thought it would be easy to recreate… well, easier than anything else she has posted. I’m sure mine didn’t taste nearly as good as hers, but good job, good effort right???

Tupperware Tuesday: Stir-Fried Lemongrass Chicken

Tupperware Tuesday, a real look at the food I make each week. No fancy cameras, no lightbox contraption, no perfect angles. Just what’s for lunch.


Untitled

Adapted from Cooking Light, January 2013.

I substituted chicken breast for chicken thighs since I’m really not a big fan of dark meat. I don’t mind it so much if it was fried, but then again, practically anything is good fried! This was the first recipe I made with lemongrass that didn’t involve broth. I was kind of clueless about what to do with the lemongrass, but that’s what YouTube is for! amiright???

Unless you want a big block of rice noodles in your tupperware, I would recommend vermicelli noodles. However, if you’re making this recipe for dinner then I would serve with thicker noodles.

Tupperware Tuesday: Spicy Thai Basil Chicken

Tupperware Tuesday, a real look at the food I make each week. No fancy cameras, no lightbox contraption, no perfect angles. Just what’s for lunch.


Untitled

Adapted from Cooking Light, January 2013.

I found this recipe in the January 2013 issue and I’ve already made it a several times! A couple times as lettuce wraps (using Boston Bibb) and a couple times, as pictured above, mixed with quinoa. Both lettuce and quinoa provide a nice contrast in texture and a balance to the flavorful ground chicken and bell peppers. And while lettuce is great when I want to go low carb, I seriously love me some quinoa. I really don’t understand why Henry doesn’t like it. Quinoa is the best thing ever! I think I appreciate it more because it’s not as heavy as say, brown rice, and more importantly, doesn’t give me heartburn.

Tupperware Tuesday: Maple & Soy-Glazed Steak

Tupperware Tuesday, a real look at the food I make each week. No fancy cameras, no lightbox contraption, no perfect angles. Just what’s for lunch.


Untitled

Adapted from Cooking Light, March 2010.

I made the steak pretty much as directed except I used tri-tip, which was on sale at Fresh & Easy, and significantly increased the amount of Sriracha. I also made extra marinade to toss with whole wheat thin spaghetti. Since I had left over baby spinach, I sandwiched leaves between the steak and spaghetti, drizzling extra sauce over to finish. The heat from the microwave wilted the spinach just enough to take away the raw taste.

I loved the sauce. I definitely saved this recipe just for the sauce.

I make: Mapo Tofu

When I found this recipe in Cooking Light Magazine, I welcomed the change since the only other Asian recipe we make involving ground pork is our Ground Pork with Green Beans. Is it weird that we don’t make a lot of Asian food?? Anyway, this recipe is traditionally made with soft tofu, but my preference is medium-firm because it holds up nicely while cooking and is soft enough when eaten. Also, though I love eating spicy foods, my stomach can’t handle that much heat anymore so the recipe, as is, might be too tame for some people (you can tell by the picture below since the sauce isn’t BRIGHT RED).

Adapted from Cooking Light Magazine (April 2010)

(yields ~6 servings)
Ingredients:

Meat
1 lb ground pork
1/2 tsp sugar
1 tsp cornstarch
1 tsp garlic powder
1 tsp onion powder
1/2 tsp dried sweet basil
1 tsp less-sodium soy sauce

1 tbsp canola oil
1 tbsp minced garlic
1/2 tbsp minced ginger
1 (14 oz) package medium firm tofu, drained

Sauce
2 tbsp Sriracha (increase as desired)
1 1/2 tbsp mirin
1 tbsp black bean garlic sauce
2 tsp sugar
2 cups fat-free, less-sodium chicken broth
2 tbsp cornstarch
1 tbsp less-sodium soy sauce
2 tsp chili oil (increase as desired)

White rice
Scallions for garnish

Directions:
1. Place tofu on paper towel; cover with paper towel. Top with heavy skillet and let stand 30 minutes. (One reason why medium firm tofu works better vs. soft tofu, plus I just prefer firmer tofu anyway). Cut tofu in 1 inch cubes.
2. Season meat: Combine all ingredients under “Meat” section. Let rest for 10 minutes.
3. Sauce: Combine Sriracha through sugar in one bowl. Combine chicken broth through chili oil in another bowl; whisk until smooth.
4. Heat canola oil in a large skillet (or wok) over medium heat.
5. Add garlic and ginger; stir-fry for about 2 minutes.
6. Add pork; stir-fry for 5 minutes or until almost cooked through.
7. Add Sriracha mixture; combine thoroughly and cook for 1 minute.
8. Add broth mixture; bring to a boil and cook until sauce thickens.
9. Stir in tofu.
10. Serve over white rice and garnish with green onions.

IMG_0751

No beauty shot this time – just straight out of the wok, but you get the point 🙂

Note: I changed the ratio of tofu to ground pork because Henry specifically requested less tofu.

Bon appetit!

I make: Roasted Chicken Breast

This recipe is one of my favorites and one that I make most often. It’s quick, easy and the chicken breasts always come out so flavorful and juicy. I’ve also used the marinade on chicken thighs and they’ve turned out just as delicious.

Adapted from The Fine Cooking, The Best of Chicken

(yields ~ 4/5 servings, 1 chicken breast each)
Ingredients:
1 pack of bone-in, skin-on split chicken breasts (the ones I buy come in 5)
6 tbsp dijon mustard (I like to substitute 1 or 2 tbsp of honey truffle mustard if I have it available)
6 tbsp olive oil (I use Stonehouse Roasted Garlic Olive Oil)
3 tbsp balsamic vinegar
1/2 tsp kosher salt
1/2 tsp freshly ground pepper
(Additional kosher salt/pepper before baking)

Directions:
1. Whisk together mustard, olive oil, balsamic vinegar until smooth. Marinade chicken breasts for at least 6 hours – for me, it’s usually about 8.
2. Preheat oven to 400°.
3. Bake chicken in the middle rack for 20 minutes. Baste chicken with its own juices.
4. Continue to bake for 10 minutes. Baste again.
5. Continue to bake for 10 minutes. Baste again.
6. Continue to bake for 10 minutes.

THAT’S IT!

IMG_0074

Bon appetit!

Working On My Fitness

I was tired of being a piece of lard, so I finally did something about it. After a year of failing to get back into an after work gym routine, I came to grips with reality: I’M TOO DAMN LAZY TO GO TO THE GYM AFTER WORK. 10+ hours of work makes me just want to chill out and do nothing afterwards… is that so wrong????? Anyway, if I really wanted to work out and get back into shape, mornings were my only option. Thanks to J, I signed up for 10 sessions of morning boot camp that meet 2x a week at 6AM!

6AM!!

Crazy right? On Mondays and Wednesdays, I get up at 4:30AM, eat a light breakfast and head out to Marina del Rey before 5. There are usually about 10 people and this class kicks all of our asses. TRUST.

Henry and I have also been trying to eat more healthy. This week we poached a big batch of chicken and split it into two recipes. We made pesto chicken sandwiches for lunch…


{via Cooking Light}

Note: I omitted lemon juice, walnuts and celery from the recipe. I used Classico Traditional Pesto Sauce, fat free mayo and regular wheat bread. SO DAMN GOOD.

… and chicken salad with cranberries for dinner.

{via Cooking Light}

Note: I omitted almonds and celery from the recipe and reduced the ground pepper (1/2 tsp is a bit much, I think). I used fat free mayo and plain fat free yogurt.

Notice a theme? I HATE CELERY.

Chicken Pie

I’ve been wanting to try out this pie for a while now, ever since Christmas, but Harry and David was completely sold out of it until a week after New Years!

IMG_9984

I first heard about this pie from a coworker, who mentioned that it was one of Oprah’s favorite things. I checked it out on the Harry and David website and I was very intrigued because it was just crust, gravy and chunks of chicken – no veggies AT ALL!

IMG_9998
Not exactly a balanced meal

After an hour and half, we were ready to eat!

IMG_0014 IMG_0026

As you can see, they do not skimp on the chicken. The flaky, buttery crust reminded me of Ritz crackers and the gravy was rich, creamy and flavorful. If the pie wasn’t so unhealthy and pricey ($20 each + shipping, unless you buy in store), I would probably eat it more often. Henry thought the pie was too plain, as did some of the Harry & David reviewers, so this pie is not for everybody.

If you’re interested, you can order online here and here.

I make: Bacon and Chicken Mac n’ Cheese

IMAG0128
Can you believe this is May?????

We usually pack up our snowboards and gear in April, but this year, the stars aligned (MVP12 season pass + cheap condo) and we spent this past weekend in Mammoth with a couple of friends.

Henry and I wanted to shop for groceries before we left for Mammoth so we had to make a game time decision on what to make for dinner (breakfast is so much more simple!). Our friends suggested pasta and the first thing that popped into my head was spaghetti bolognese. I totally would have went with that if I hadn’t made it for lunch earlier in the week; my stomach just can’t handle that much acidity 😦 So, we went with mac n’ cheese instead. You can’t go wrong with mac n’ cheese, am I right??

(yields 4 servings)
Ingredients:
8 oz uncooked Cavatappi (do NOT substitute elbow macaroni!!!!)
3 slices maple bacon
8 oz boneless, skinless chicken thighs – cut into 1/2 inch pieces
1/4 tsp kosher salt
1/4 tsp freshly ground pepper
1 tbsp unsalted butter
1 tbsp all-purpose flour
1 1/2 cups whole milk
1/2 can of cream of mushroom soup
1 cup shredded four-cheese Italian blend
1 cup shredded Parmesan
1/2 tsp onion powder
1/2 tsp garlic powder
1/2 tsp kosher salt
Cooking spray
1 cup shredded Colby-Jack cheese

Directions:
1. Cook pasta in large pot; drain.
2. While pasta cooks, cut bacon into small pieces and cook in large non-stick skillet over medium heat until crisp. Remove bacon from pan and place onto paper towel covered plate. Reserve about half of bacon drippings.
3. Increase heat to medium-high. Season chicken with salt and pepper. Add chicken to bacon drippings and cook until browned and done (about 5-6 minutes).
4. In medium size bowl, combine milk and cream of mushroom soup. Set aside.
5. Melt butter in large saucepan over medium heat. Whisk in flour and cook for 2 minutes.
6. Gradually add milk/soup mixture and stir with whisk. Bring to a boil and cook until thick. Turn heat down to low and let sit for a few minutes.
7. Add Italian cheese blend and Parmesan cheese, onion powder, garlic powder and salt. Stir until cheese is melted.
8. Preheat boiler.
9. Coat baking dish with cooking spray. Pour in the pasta, chicken, bacon and cheese sauce. Mix together so that the sauce is well incorporated. Sprinkle evenly Colby-Jack.
10. Broil for 3 minutes or until the Colby-Jack cheese is melted.

IMAG0126
DEVOURED

We made two containers full and that was all that was left. Proof that you can never go wrong with mac n’ cheese… especially when bacon is involved.

I’ve also made this recipe with chicken breast and it tasted just as good. If you want a more high-end mac n’ cheese, substitute the Italian cheese blend with a combination of smoked Fontina and smoked Gouda – they’ll definitely take the mac n’ cheese to another level of deliciousness!!!!

baconchkmac
Official beauty shot

Bon appetit!

I make: Salisbury Steak

When I think of salisbury steak, two images immediately pop into my head:

1) hungry man dinners
2) elementary school lunches

Not exactly selling points, right?

Well, seeing the recipe in the December issue of Cooking Light was enough for me to try to make it myself (you can find the recipe in the “Dinner Tonight” section).

Adapted from Cooking Light Magazine

(yields ~ 4 servings)
Ingredients:
1/3 cup grated onions, divided
1/2 tsp black pepper
1/4 tsp salt
1/2 tsp soy sauce
2 garlic cloves, minced
1 lb ground sirloin
1 tbsp olive oil
1 tbsp butter
8 oz baby portabellas (I cheat and buy pre-washed/pre-sliced)
1 1/2 cups fat-free, lower-sodium beef broth
1 1/2 tbsp Wondra flour
1 tsp red wine vinegar

Directions:
1. Combine 1/4 cup onion, pepper, salt, garlic, soy sauce and beef. Shape into 4 (1/2 inch thick) patties.
2. Heat olive oil in skillet over medium-high heat.
3. Add patties and cook each side until browned (~3 min).
4. Remove patties and add butter to the pan. Saute mushrooms and remaining onions in melted butter (~6 min).
5. Sprinkle flour into the mushroom mixture and cook for about 1 minute. Pour in broth and bring to a boil. Gravy should thicken up in about 10 minutes – stir to ensure no clumps.
6. Add patties, vinegar to pan and cook for an additional 2 minutes.

I really loved the mushroom gravy – it was the best part of the recipe! The vinegar enhances the gravy’s earthy/beefy flavor. Even though I adjusted the original recipe, I still think the patties needed more seasoning. Oh, and make sure you don’t form the patties thicker than 1/2 inch. Otherwise, the steak/gravy ratio will be off and that’s a bad, bad thing. Or you can just make extra gravy 🙂

IMG_0664

Bon appetit!

I make: Red Velvet Cupcakes

I measured out all the ingredients before I realized I left my mixer attachments at my friend’s apartment. I didn’t want to just quit and throw everything away so Henry and I sucked it up and mixed everything by hand!

These babies turned out soooo yummy; you can really taste the love and hard work that we put into it.

I guess it’s true – anything is possible with a little bit of elbow grease.

IMG_0565 IMG_0576

Adapted from Paula Deen’s recipe

(yields ~21-24 cupcakes)
Cake Ingredients:
2 1/2 cups all purpose flour
1 1/2 cups sugar
1 tsp baking powder
1 tsp salt
1 tbsp cocoa powder
1 1/4 cups vegetable oil
1 1/4 cups buttermilk, room temperature
2 large eggs, room temperature
2 tbsp red food coloring
1 tsp white distilled vinegar
1 tsp vanilla extract

Frosting Ingredients:
8 oz. packaged cream cheese, softened
1 cube butter, softened
1/2 tsp vanilla extract
2 cups confectioners’ sugar

Directions:
1. Position rack in the center of the oven. Preheat oven to 350°.
2. Line 2 (12 cup) muffin pans with Reynolds foil baking cups – I recommend the foil ones because the oil from the cupcakes can soak into the paper cups. (BTW, I only had enough batter to fill 21 cups)
3. In medium mixing bowl, mix together all the dry ingredients: flour, sugar, baking powder, salt and cocoa powder.
4. In large mixing bowl, use electric mixer to gently beat together the wet ingredients: oil, buttermilk, eggs, red food coloring, white distilled vinegar and vanilla extract.
5. Slowly add the dry ingredients into the wet and mix until smooth and thoroughly combined.
6. Pour batter into each baking cup until 2/3 full. Bake for approximately 18-20 minutes using a toothpick to test doneness. Remove from oven and let cool.
7. For frosting: in large mixing bowl, use electric mixer to beat cream cheese, butter and vanilla extract together until smooth. Add sugar (1 cup at a time) and mix at low speed until fully incorporated. Increase speed to high until frosting is light and fluffy.
8. Once cupcakes have completely cooled, use butter knife to frost.

IMG_0575

I should have took off the foil. Oops!

Bon appetit!

Bye Bye Birdie

As I’ve mentioned before, I love duck. Duck confit, roast duck, Peking duck, duck a l’Orange; you name it, I’ll eat it. So when one of the managers at work offered me wild duck, I jumped at the opportunity. Apparently teal duck hunting season started a couple of weeks ago.

image

The duck breasts are small – about the size of my fist. As suggested, I sauteed the breasts until nicely browned, added cream of mushroom soup to make a gravy, served over white rice… mmmm mmmmm delicious!

I make: Hawaiian Bread Pudding

IMAG0191

Instead of dressing like a sloozy and freezing my ass off on Halloween, my good friend and I decided to have a girls night in.

Shabu + Hawaiian Bread Pudding + Red Velvet Cupcakes + TRUE BLOOD = Great Night ♥

I first came across this Hawaiian Bread Pudding recipe at work. One bite and I was IN LOVE. The recipe is so easy to make and budget friendly as well. I’ve made it for holiday parties, Mammoth trips and just because. It’s super delicious by itself, but even more so when eaten with vanilla bean ice cream. TRUST.

Ingredients:
1 round loaf of King’s Hawaiian Bread
1 cup granulated sugar
2 cups half & half (or 1 cup milk, 1 cup half & half)
1 cube of butter
5 eggs

Directions:
1. Preheat oven to 350°.
2. Grease a 9×13 baking dish.
3. Cut round loaf of King’s Hawaiian Bread into cubes. You can also just rip the bread into pieces. Place the bread cubes in the baking dish.
4. Heat half and half in a pot over medium heat. Add butter and sugar and stir until fully melted. Take off heat and allow mixture to start cooling.
5. Beat eggs in large bowl.
6. Temper the eggs: Add a small amount of the half and half mixture while whisking vigorously. The point is to slowly increase the temperature of the eggs, otherwise you will just end up with scrambled eggs.
7. Add egg mixture to bread, making sure that it is distributed evenly. Let the bread soak up the egg mixture for at least 30 minutes.
8. Bake for 35-40 minutes. You should see the bread rise/puff up.

You. Will. Love. It.

IMAG0192

Bon appetit!

I Make: Jerk Chicken Drumsticks

Yes, you read correctly. Drumsticks. As in dark meat. As in the kind of meat I said I didn’t like.

Why did I do it? I wanted to save money. I didn’t want to pay $3.99 for chicken breast, so I caved. $0.99 a pound for chicken thighs and drumsticks? Alright, I’m in.

(yields ~3-4 servings)
Ingredients:
10 thin scallions, coarsely chopped
1 habanero chile, seeded and coarsely chopped (DO NOT SUBSTITUTE)
2 tbs. distilled white wine vinegar
1 tbs. fresh thyme leaves
3 medium garlic cloves, chopped
1 1/4 tsp. ground allspice
Kosher salt and freshly ground black pepper
10 chicken drumsticks (~3.5 lbs)
Cooking spray

Directions:
1. Add scallions, habanero, vinegar, thyme, garlic, allspice, pinch of salt and pepper into food processor. Pulse to a thick paste.
2. Transfer paste into large ziplock bag and add drumsticks. Toss to coat and let stand for about 15 to 20 minutes.
3. Make sure rack is in the center of the oven and turn the broiler on high.
4. You can use a broiler pan to ensure crispiness, but I used a regular baking pan and the drumsticks turned out fine. Foil the pan and coat generously with cooking spray.
5. Season both sides of the drumstick with salt and pepper. Arrange on the baking pan, skin side down.
6. Broil chicken for 10 minutes, turn over, and continue to broil until nicely browned in spots (from the paste) ~ 20 minutes total.

IMG_0154

If you have a ginormous food processor like me, then cleaning might be a pain in the ass, but trust me, this recipe is totally worth it! You can make these babies for parties, bbqs, tail-gating, etc. The heat is not as intense as you would think since the habanero is seeded, but if you want more heat, just coarsely chop the habanero with seeds and add to the food processor.

Bon Appetit!

I make: Chipotle Turkey Chili

I love one pot wonders! They make life so much easier, don’t they? This recipe was a winner in my book since it required minimal ingredients (most of which I already had in my pantry) and minimal prep/cooking time.

The recipe doesn’t call for this, but I ALWAYS season my ground meats before cooking. I treat every ground meat the same: add a bit of sugar, garlic/onion powder, cornstarch and soy sauce. I mix everything together to fully incorporate and let it rest for about 10 minutes.

Adapted from Cooking Light’s “Fresh Food Fast Weeknight Meals” Cookbook

(yields ~5-6 servings)
Ingredients:
1 lb ground turkey
1/2 tsp granulated sugar
1 tsp garlic power
1 tsp onion powder
1 tsp cornstarch
1 tsp soy sauce
1 tbsp canola oil
1 large poblano pepper, seeded and finely chopped
2 cups water
1 teaspoon chipotle chili powder
2 (16 oz) cans pinto beans, rinsed and drained
1 (16 oz) jar mild salsa

Directions:
1. Season ground turkey: Put ground turkey in large bowl. Add sugar, garlic powder, onion powder, cornstarch and soy sauce. Mix in one direction until everything is incorporated. Set aside for 10 minutes.
2. Heat canola oil in a medium saucepan over medium-high heat.
3. Add ground turkey and poblano pepper. Crumble ground turkey and cook until browned.
4. Stir in water, chipotle powder, pinto beans and salsa. Cover and bring to a boil.
5. Mash beans lightly with a potato masher until soup is slightly thickened.

This chili was flavorful and hearty! I can’t wait to make it again during winter, perhaps during one of our Mammoth trips 🙂

IMG_8009

Bon appetit!

I make: Steak & Potatoes

I’ve been working 12 hour days lately so I haven’t had the time to cook the meals that I’ve wanted to cook; I haven’t had the time to try new recipes and be creative. All my meals for the past two months have been my favorite repeats that I’ve stored away in my quick, easy and delicious file.

Since things have finally started to ease up, I had a chance to try out a new recipe this weekend. I found this recipe to be a nice breath of fresh air from eating A LOT of chicken and fish.

Adapted from Cuisine for Two Magazine

(yields 2 servings)
Ingredients:

Steaks –
2 tsp. brown sugar
1 tsp. garlic salt
1 tsp. paprika
1/2 tsp. chili powder
1/2 tsp. ground black pepper
2 steaks (any cut)
1 Tbsp. olive oil

Sauce –
1/2 tsp. minced garlic
1 tsp. tomato paste
1/2 cup port wine
1/2 cup low-sodium beef broth
1/2 tsp. Worcestershire sauce
1 Tbsp. honey
1 Tbsp. light butter (I like “I Can’t Believe It’s Not Butter, Olive Oil Light)

Sides –
1 Tbsp. olive oil
1/2 cup grape tomatoes
8 cups spinach
2 medium sweet potatoes
1 Tbsp. honey
1 Tbsp. light butter (I like “I Can’t Believe It’s Not Butter, Olive Oil Light)

Directions:
1. Peel sweet potatoes and cut into cubes. Place in pot of water and bring to a rolling boil until sweet potatoes are fork tender.
2. Combine brown sugar, salt, paprika, chili powder, and pepper. Press the spice mixture onto both sides of the steaks.
3. Heat 1 Tbsp. oil in a skillet over medium-high heat. Add steaks and cook to desired doneness (~2 to 3 minutes per side for medium-rare). Remove steaks and keep warm.
4. Do NOT wipe skillet and turn down heat to medium. Add garlic and cook for about 30 seconds. Stir in tomato paste and cook for 1 minute.
5. Deglaze pan with port wine, scraping up the bits on the bottom. After liquid is reduced by half, stir in broth and Worcestershire, bring to a boil, and simmer for 2 minutes. Whisk in butter, honey and season with salt and pepper to taste. Remove sauce and keep warm.
5. Clean out skillet to cook spinach. Heat 1 Tbsp. oil over medium-high heat. Add tomatoes and cook until blistered (they will pop and juice will ooze out!). Add spinach and cook until wilted.
6. Drain potatoes and mash while incorporating butter and honey.

The original recipe called for chili-spiced potatoes, but since Henry wanted to be “healthy”, we substituted Yukon gold potatoes, buttermilk and chipotle peppers in adobo sauce with sweet potatoes and honey. I thought this change would work well since the spice rub had brown sugar, but just to make sure, I added some honey to the port sauce to kick the sweetness up a notch.

IMG_7808

Bon appetit!

I make: Chicken with Lemon-Chive Vinaigrette

Yes, another chicken recipe. It’s necessary when you live with someone who is a lean, mean chicken eating machine.

Chicken can be so boring, especially when it’s all chicken breast, all the time. I actually prefer chicken breast over dark meat; I view eating thighs as a hassle because of the bones and extra fat. However, I don’t disagree with the general observation that chicken breast is more dry and less flavorful than dark meat. To prevent the chicken breast from becoming dry, I usually incorporate one of the following methods:

1. A marinade with some acidity helps tenderize the chicken breast (or any meat for that matter)
2. Coating the chicken breast in flour helps retain moisture

Works every time 🙂

(yields 2 servings)
Ingredients:
2 tbsp. lemon juice
1 and 1/2 tbsp. honey
1 tsp. Dijon mustard
2 tbsp. olive oil
1 tbsp. chopped fresh chives
1 tbsp. olive oil
2 boneless, skinless chicken breast halves (5 oz each)
Salt and pepper
2 tbsp. all-purpose flour

Directions:
1. A LOT of whisking: Whisk together lemon juice, Dijon mustard and honey until honey dissolves and sauce is smooth. Pour in olive oil slowly while whisking to create an emulsion. Add chives, whisk to incorporate into sauce.
2. Heat oil in skillet on medium/medium-high.
3. Sprinkle chicken breast with salt and pepper and coat in flour.
4. Cook chicken about 4 minutes per side, should be nice golden brown in color.
5. Drizzle sauce over chicken and serve.

IMG_6771

Bon appetit!

I make: Vietnamese Caramelized Chicken

I’m not Vietnamese, but I do love me some Vietnamese food. When I came across this recipe, I thought, “What the hell is Vietnamese Caramel Chicken”???? Convinced that this recipe was just made up by the Cuisine for Two Magazine editors, I proceeded to do some research online. Surprise surprise, it does exist and there are many people out there who love this dish.

Anyway, the concept is simple: melt sugar to caramelize chicken. However, if you’ve never made caramel (which is basically melted sugar) before, then simple may not be the right word to describe this recipe. The first time I made caramel, it was to drizzle over my homemade sticky toffee pudding, and I failed miserably! The key is to melt the sugar on medium (or lower heat if the sugar starts looking lumpy) and wait for the sugar to slowly turn into the color of ice tea. This process takes about 5-7 minutes. I usually don’t like to stir my caramel until the very end; I swirl my pot instead. You can stir the caramel if you like, but make sure you don’t over stir, otherwise the sugar particles will just lump together instead of melting and liquifying.

Adapted from Cuisine for Two Magazine

(yields 2 servings)
Ingredients:
3/4 cup dry jasmine rice
3/4 cup water
1/2 cup sugar
1/4 cup low-sodium chicken broth
2 tbsp. fish sauce
2 boneless, skinless chicken breast halves (5oz each)
2 tbsp. canola oil, divided
1 tbsp. minced fresh ginger
1 tbsp. minced shallots
1 tbsp. minced garlic
1/4 cup bias-sliced scallions
2 tbsp. torn basil leaves

Directions:
1. Cook rice as instructed (I use a rice cooker)
2. Melt sugar in a saucepan on medium heat.
3. Combine fish sauce and chicken broth. After caramel forms (turns ice tea color), pour broth mixture and whisk, whisk, whisk! **When liquid is added to caramel, it will bubble furiously. Take off heat and set aside.
4. Heat 1 tbsp. of canola oil in skillet/fry-pan on medium/medium-high heat. Sear chicken about 3 minutes per side. You just want a nice golden brown color to develop on the chicken – you are NOT cooking the chicken all the way through. Remove from pan.
5. Heat remaining tbsp. of canola oil. Add ginger, shallots and garlic into pan and saute for about a minute or two, or until shallots turn translucent.
6. Return chicken to the pan and pour in caramel sauce. Reduce to medium-low heat and simmer until chicken is cooked through and sauce thickens.
7. Plate rice with chicken on top. Scatter scallions and basil on top of chicken and spoon sauce over chicken.

IMG_6767

At first I was worried about the sauce being too sweet, but it came out just right. Having the chicken simmer in the sauce made the chicken incredibly flavorful! Now I know why so many people love this dish.

Bon appetit!

I make: Crispy Fish

I’ve been testing a lot of recipes from the April issue of Cooking Light. Last week, I made spicy gumbo for lunch and saffron fish stew with white beans for dinner. I bought 2 pounds of cod and decided to use a little more than half for the fish stew and use the rest for another recipe: crispy fish with lemon-dill sauce.

The recipe was easy to follow and it really did only take 30 minutes to prep and cook, as the magazine advertised. Since the cod was breaded with panko and broiled in the oven (instead of fried), I didn’t feel guilty eating it. To keep in line with our healthy meal, I substituted low-fat mayo for the suggested canola mayo to make the “tartar sauce”.

fish1

Note: it is imperative that a broiler pan is used, otherwise the fish will turn out a soggy mess.

This recipe was a quick, healthy alternative to fried fish that I would make again. I just wished the panko would’ve browned a bit more evenly; I have a love/hate relationship with my oven.

Bon appetit!

I make: Sole Meunière

I’ve been meaning to spend my $20 gift card to Target that I received as a Christmas gift, but there was never anything that sparked my interest… until last weekend. As I was browsing through the book section, I came across Ina Garten’s Back to Basics cookbook. When I first started watching food network in college, I wasn’t really a fan of Ina’s. I think this was mostly because I wasn’t quite ready for her more mature style of cooking; I was still stuck in a phase where a meal was predicated on convenience. Being a poor college student, ramen noodles and boxed “one-meal” dinners were staples in my pantry. Fast forward six years and I now have the opportunity to splurge on quality ingredients/cookware and as time has passed, my tastes have changed and my cooking style has progressed. Now I can fully appreciate Ina’s culinary expertise and I’m really excited to try every recipe in her cookbook!

IMG_6664

For my first recipe, I chose sole meunière because I happened to have a few fillets of dover sole in the ‘fridge. All of the other ingredients (flour, butter, lemon, parsley) are staples in my kitchen and I’m sure they’re also stocked in yours.

solemeuniere

Simple ingredients, quick preparation and cook time, absolutely delicious. This has now become my go-to dish when I’m in a pinch for time. Lemon + butter = LOVE.

Bon appetit!

I make: Chicken Katsu

We wanted to make something quick and easy since we figured we would be tired from a long drive home from Mammoth. I remembered that we had some chicken in the ‘fridge and a box of panko in the pantry, so it was a no-brainer to make chicken katsu. Who doesn’t love a breaded piece of chicken? And btw, panko is far superior than regular bread crumbs since it’s much more crispier.

(yields about 8 servings + rice)
Ingredients:
4 boneless, skinless chicken breasts (each halved to 8 thin pieces)
salt and pepper to taste
1/2 cup all-purpose flour
2 eggs, beaten
1 1/2 cups panko bread crumbs
1 cup canola oil, or as needed

Directions:
1. Place flour, eggs, and panko in 3 separate shallow dishes.
2. Heat 2 tablespoons of oil (per piece of chicken) in frying pan on medium-high heat.
3. Season chicken breasts with salt and pepper on both sides. Dip in flour, then egg, then coat thoroughly with panko bread crumbs.
4. Cook chicken about 4 minutes each side, or until golden brown.
5. Remove chicken and place on paper towel to soak up excess oil.

Serve over rice with katsu/tonkatsu sauce (available in most markets)

IMG_6597

Bon appetit!

Great Escape

A weekend in Mammoth is never enough. It’s always depressing when we have to pack up and go home. I wish I won the lottery so I could stay up here for the whole winter!

The conditions were spring-like this weekend: hard-packed surfaces in the early mornings that turned into slushiness in the afternoon. This was due to temperatures reaching 40-50 degrees during the day (which is super HOT!) and cooling down to 20s at night for the past week or so. Despite dying from the heat while waiting in the lift lines, I was more than pleased with the beautiful clear blue skies and low winds. You win some, you lose some, right?

IMG_9549
Us at the top with Henry’s friends that we met up

We stayed in the Bradley building of Summit Condominums (#246), which is about a 5 minute walk from Eagle Lodge. We found a pretty good deal and booked our 1 bedroom/1 bath condo through 101 Great Escapes. While this was definitely a better experience than the one I had two weeks ago, there were still a few issues with the condo. Being on the 2nd floor, we had to walk up three flights of stairs from the underground parking garage to get to our condo. When you’re exhausted from a full day of boarding and fueled by only a few hours of sleep (or about half an hour in Henry’s case), the last thing you want to do is climb stairs. It would have been nice if the website stated which floor the condo was located, though I’m not sure how much this would have swayed my decision at time of booking since this was the cheapest and best looking condo we found. Best looking was determined by the pictures provided and as I first walked through the condo, I realized that the pictures on the website made the condo look nicer than it really was. I didn’t mind this too much at first because everything seemed clean, but the kitchen was HORRIBLE! All the dishes/utensils/cookware were dirty, and by dirty I mean I found food particles and grease stains. I didn’t go on vacation to clean someone else’s mess!

IMG_9552

Despite the dirty kitchen, we still cooked our meals as usual. I used two recipes from the Cooking Light magazine that I recently bought. Both recipes happened to have bacon; bacon makes everything better, doesn’t it? I did change the recipes slightly, such as using 2% milk instead of non fat and adding more cheese, so I guess I wasn’t really “cooking light”. But hey, there’s nothing wrong with extra cheese. 🙂

IMG_6567
Spicy shrimp and grits

baconchkmac
Bacon, ranch and chicken mac and cheese

I’ve Got Two Tickets To Paradise…

It was our 40 month anniversary yesterday. I know, it’s silly to keep track like this, but it’s nice to know that we are still madly in love with each other! Looking back on our relationship, my fondest memories revolve around all of our trips together. We’ve taken one big trip every year and each year has certainly topped the last. I’m in the planning stages for this year’s trip!

Last year, we had quite an adventure in the Pacific Northwest. Absolutely beautiful. We started off in Portland and made our way to Seattle, stopping at Mt. St. Helens and Mt. Rainier along the way.

IMG_0504

We arrived in Portland at about 10PM at night and we took a taxi to our “hotel”. The Kennedy School is an old elementary school that McMenamins renovated into a hotel. Most of the original classrooms were split into two guestrooms with a bathroom added in each room. Besides this, the look and feel of the school were pretty much kept intact. Chalkboards, perhaps original, wrapped around the guestrooms and there were white water fountains in the hallways. Memorabilia of the school and of those times decorated the walls. Other classrooms were turned into bars/lounges with incredibly cute names: The Honors Bar, The Detention Bar, etc. It was truly a unique experience to stay at The Kennedy School!

IMG_0241

We decided not to rent a car at the airport since it was ridiculously expensive! We saved a lot of money by renting from a non-airport location instead and since it was located within 5 miles of our place, we were able to get free pick up service. Most of our first full day was designated to sightseeing and eating. As you can see, it was a really warm day.

IMG_0322IMG_0333

The main reason we stayed in Portland was because we wanted to go white water rafting. There are many rafting outfitters around Washington and Oregon and we decided on Wet Planet, which is located near Hood River, Oregon, approximately an hour and 15 min drive from Portland (scenic drive). It was our first time river rafting and our guide, Sara, did a great job of making sure we were all having fun while keeping us safe. The trip was about 8 miles total, with rapids classified as class III-IV (solid class IV fall known as “Husum Falls” – 10′ vertical drop). I was a little nervous for Henry because I know he’s not the best swimmer (he almost drowned in Hawaii – that’s another story for another time), but good thing we all survived; no one in our 6 person raft fell overboard into the water, not even when we went down Husum Falls!

IMG_1213IMG_1271

On our way back from rafting, we stopped at Multnomah Falls. This would be our first waterfall of the trip 🙂 If we had more time, I would have liked to hike the trails around the falls.

IMG_8677

——–
Portland Eats & Drinks (+my verdict):
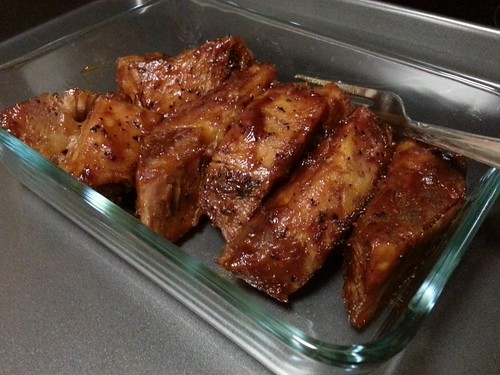
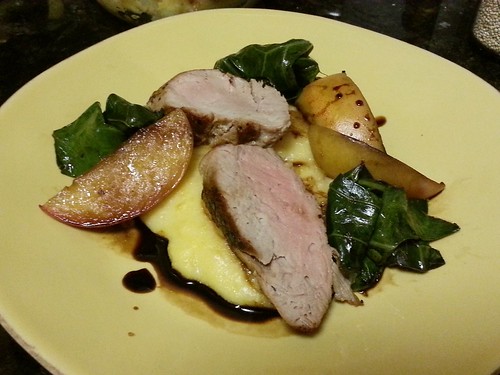
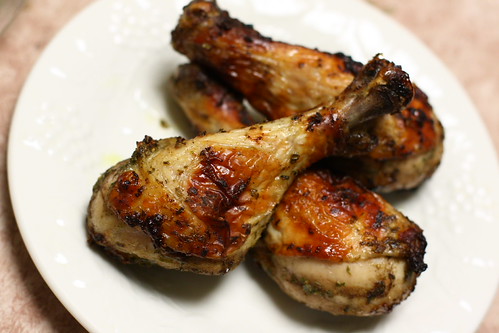
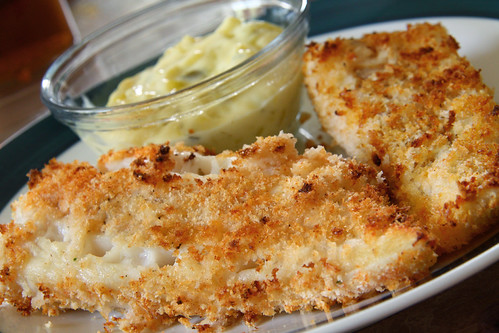
Mother’s Bistro & Bar, 4/5
Coffeehouse Northwest, 4/5
Toro Bravo, 4/5
The Screen Door, 4/5
Voodoo Donut, 3/5
Pambiche, 4/5
——–

The next part of our trip was definitely my favorite! We drove up to Mt. St. Helens and hiked through the lava cave and then we drove to Mt. Rainier and stayed there a few days.

The lava cave (Ape Cave) was really fun and really scary at the same time. It was mostly an easy-moderate hike, with the difficulty being the huge rocks that you have to climb over as well as the 9 foot wall you have to climb up. If you are claustrophobic or scared of the dark, Ape Cave is totally not for you. As we were hiking through the upper passage of Ape Cave, I actually had thoughts of being trapped underground or being attacked by.. ghosts (yes, ghosts), but I quickly calmed myself down and thought of something else. I found comfort in hearing the voices of other groups – perhaps its the “at least I’m not going to die alone down here” rationalization. The upper passage of Ape Cave is 1 1/4 miles and took about 2 and a half hours to explore. We spent about another hour to hike the mile long trail above ground that took us back to the entrance of the cave.

IMG_8732IMG_8809

I originally planned to drive to the Johnston Ridge Observatory for a great view of Mt. St. Helens, but we just didn’t have enough time since we still had to make a 3 hour drive to Mt. Rainier. We picked up some groceries before we headed to Almost Paradise Lodging, our home for the next few days. This place is absolutely fantastic! Everything was clean and I felt right at home. Our fridge was stocked everyday with a complementary continental breakfast basket during our stay. The jacuzzi right outside definitely helped us relax after a long day of hiking. At night, all we could see were the faint lines of the trees that blended in with the black sky and the bright stars sprinkled throughout. Amazing…

IMG_0724IMG_1140

We technically only had one full day to explore Mt. Rainier, which was really sad since it is such a beautiful place. For our full day, we did a 4 mile hike on the Paradise River/Narada Falls trail. We started at Cougar Rock and ended at the Henry M. Jackson Visitor’s Center in Paradise, for a total elevation gain of 2,000ft (good hiking condition is required). It was a little difficult to find the trailhead, but luckily we were able to follow people that were headed the same way.

IMG_0861

IMG_0913

We took a lunch break to eat our cole slaw turkey sandwiches at Carter Falls. As we continued along, we passed by Madcap Falls and about 2 miles later, we reached the famous Narada Falls. You can technically take the Paradise shuttle and get dropped off here, but come on, we are no weaklings! It wasn’t enough to just view the falls from the top, we decided to climb down towards the flowing river to get a different view of the falls. BEAUTIFUL. After Narada Falls, Paradise was only a mile away. Even though it was late July, snow still scattered the ground (especially as we neared Paradise). I had some difficulty getting up a hill because it was blanketed with snow and my hiking shoes didn’t provide enough grip/traction. We didn’t have that much time to explore the Paradise area since the shuttle arrived about 15 minutes after we arrived.

IMG_0971IMG_1015IMG_1044

The next day, we were able to hike a half day before heading up to the Seattle area.

IMG_1242

More waterfalls!!

IMG_1294

(to be continued…)

I make: Chicken Marsala

This is one of my favorite recipes – always on my go-to list! So easy and so delicious.

(yields about ~8 servings – I serve 1 piece of chicken each with veggies on the side)
Ingredients:
1/2 cup all purpose flour
1 teaspoon garlic salt
1/2 teaspoon freshly ground pepper
1 teaspoon oregano
4 skinless, boneless chicken breast halves – cut in half (into 8 pieces) and pounded to 1/4 inch thickness
3 tablespoon butter
4 tablespoon olive oil
1/2 cup chopped shallots
2 cups sliced baby portobellas (creminis are excellent as well)
1 cup sweet Marsala wine
1/2 cup cooking sherry
2 tablespoon brown sugar
1 tablespoon Wondra flour (to thicken sauce)

Directions:
1. In a shallow dish, mix all purpose flour, salt, pepper and oregano. Coat chicken in flour mixture.
2. In a large skillet, melt 2 tablespoon butter and 3 tablespoon oil on medium heat. Lightly brown chicken and remove from pan (don’t fully cook the chicken at this point since it will finish cooking in the Marsala sauce).
3. Melt remaining 1 tablespoon butter and 1 tablespoon oil in pan and add shallots. Cook for about 30 seconds and add sliced mushrooms.
4. When mushrooms brown and shallots turn translucent, pour in Marsala wine and sherry to deglaze pan (scrapping up the bits from the bottom). Stir in brown sugar and Wondra flour before adding all of the chicken back into the pan.
5. Reduce heat and let the chicken simmer in the Marsala sauce for 10-15 mins (rearrange the chicken half way so that every piece gets an opportunity to be submerged in the sauce.

Serve over rice, pasta, etc (or eat as is like I did).
IMG_6495

Bon appetit!

March Madness

March is definitely going to be a crazy month! This is what I have going on: Mammoth, Vegas, Mammoth .. in that order. Usually, I really look forward to sleeping in on the weekends, but I realized this morning that I won’t be able to sleep in on the weekends for the next three weeks. And by sleeping in, I do not mean getting into bed at 6am and sleeping until 12pm (likely the scenario in Vegas).

I haven’t been to Mammoth yet this season, so I can’t wait! It’s even more enticing since Mammoth has been getting dumped on these past few weeks (or this entire season practically). The weather has been quite cooperative; with all the snowfall we’ve been getting in So Cal, you can even go as far as to consider the conditions at the local mountains (Big Bear and Mt High) as being “great”. The weather man predicts that a snowstorm will hit while we’re in Mammoth this weekend. The last time I was there during a snowstorm, I was able to board all the way down to the gondola from my condo! AWESOME!!

IMG_7931

Now, I just hope that the Vons in Mammoth has King’s Hawaiian Bread in stock because I’m dying to make my delicious hawaiian bread pudding.

I make: Thai Beef Salad

In an attempt to eat “healthy” and cut out carbs at night, we made our version of thai beef salad over the weekend. I say attempt because this recipe does have a good amount of sodium, so we are going to try to balance this out by monitoring our sodium intake throughout the day.

(yields about ~8 servings)
Ingredients:
4 green onions, chopped
1 1/2 cups chopped fresh basil
2 lemon grass, cut into half inch pieces
6 thai green chilis, seeded and minced
2 limes, juiced
3/4 cup fish sauce
1 1/2 tablespoon sweet chili sauce
1 1/2 tablespoon garlic chili sauce
1/2 cup of white sugar
2 pounds (1 inch thick) beef (I used top sirloin)
1 to 2 tablespoons canola oil
1 head Boston Bibb/butter lettuce, cut into 1 inch pieces (or torn)
1/2 English cucumber, sliced
1 pink cherry/grape tomatoes, halved

(mint and cilantro can also be incorporated; I just don’t like either :))

Directions:
1. In a large bowl, stir together green onions, basil, lemon grass, thai chilis, lime juice, fish sauce, sweet chili sauce, garlic chili sauce and sugar. Adjust flavor, if necessary. Set aside.
2. Trim off excess fat around the beef, leaving about an 1/8 inch. Put beef into a ziplock bag and pour in about 1/2 of the fish sauce mixture (or just enough to coat the beef). Marinade for an hour in the refrigerator.
3. Remove from refrigerator and allow to rest at room temperature for 10 minutes. Brush beef with canola oil before placing on broiling rack and broil for approximately 4-5 minutes on each side, or until medium/medium-well. Let beef cool for 10-15 minutes before cutting into thin strips ACROSS THE GRAIN.
4. Combine lettuce, tomatoes, cucumbers and beef strips. Add as much of the reserved fish sauce mixture as you’d like (a little really does go a long way). Toss and serve.

IMG_6401

This recipe also works on the grill, but I actually prefer the broiler in terms of taste and it is also less time-consuming than the grill.

Bon appetit!

Changing Priorities

I’ve canceled my subscriptions for Us Weekly and InStyle in favor of Cooking Light. Yes, you read correctly: Cooking Light. My last few purchases have been an All-Clad 12 inch fry pan, a Wusthof Classic 8 inch hollow-ground chef’s knife and a Wusthof honing steel. I stress not about my outfits for the week, but about my meals for the week. At this point in my life, I feel like I live and breathe food.

My love for food and cooking has evolved from calling 2 packets of beef flavored ramen a meal in college to creating and executing a 5 course meal this past Valentine’s Day. I’ve come a long way, to say the least.

IMG_6400_2

9,600 ft.

Even though Mammoth is always awesome, I’ve always wanted to go snowboarding outside of California (Nevada side of Tahoe doesn’t really count). So, when Southwest Airlines launched their $30, $60, $90 promotion last year, Henry and I jumped at the opportunity and booked a trip to Colorado instantly. Round trip ticket for $120? SCORE! After much deliberation, we decided to forgo the big pricey resorts like Aspen/Snowmass and Vail for Breckenridge. This decision was based partially on the outrageous cost of an SUV rental: $600. To save about $300, we used the Colorado Mountain Express (CME) shuttle service to get to and from Denver International Airport (DIA). This meant that we relied solely on public transportation while in Breckenridge, which was fine since Breck’s “Free Shuttle” system was easy enough to navigate and very efficient. However, when you have 10 bags of groceries and a 24 pack of water to carry, not having your car can be quite a hindrance. We made our grocery trip work by taking a rolling luggage with us!

We stayed at Pine Ridge Condominiums (#6B), located right on the Four O’Clock run. The condo itself was better than I expected – we had stainless steel cookware and a great knife. It really is the little things in life that matter! 😛 We had two options, book through Expedia or book directly through the condo website. The condo website provided a rating system from silver to platinum to help guests gauge the general condition of the condo. Compared to Expedia, the equivalent condo in price booked through the condo website would have been a “silver” – no renovations within the last 5 years. We weren’t thrilled with the few options that we had on the condo website so we decided to take our chances and book through Expedia, especially since it was actually slightly cheaper to do so. By booking through Expedia, the worse case scenario would have been getting the exact condo we expected, but at a cheaper price. Taking our chances paid off because we ended up in a condo that was considered “gold”, which would cost $300 more if we booked through the website!

Poor lighting, I know.

The town of Breckenridge sits at 9,600 ft. above sea level. At high altitudes, reduced air pressure and lower oxygen concentration decreases the amount of oxygen that enters your bloodstream which, for some people, causes the onset of altitude sickness. The day we arrived in Breckenridge, Henry was already experiencing a few telltale symptoms. I didn’t have any symptoms so I thought I was in the clear for the whole trip. Boy, was I wrong. I totally forgot that all the literature I read up about altitude sickness stated that symptoms were usually worse the 2nd day at higher altitude. And like clockwork, we woke up the next morning with pounding headaches and shortness of breath. Henry also had some nausea and light-headedness. We had planned to start our day early and head up to the mountain at 9:30am, but we didn’t get out of bed until 10am because we felt like shit. To save that day from being a complete waste, we decided to go to Keystone for their “twilight” boarding (2pm-close/8pm). Keystone/Arapahoe Basin is about a 20 min bus ride (take the Swan Mountain Flyer/black line) from Breckenridge. Even though only the front side of the mountain stays open for night boarding (starting from 4pm), the runs were great.. and long! I didn’t get bored from the green and blue runs as I had expected. It was actually perfect since I was able to challenge myself to go faster.

I love feeling like I’m the only one on the mountain!

A huge part of our trip, as with all snowboarding trips, was cooking our meals, which explains why we had 10 bags of groceries. We do this because: 1) we love to cook, 2) it saves money, 3) it’s much healthier than eating hamburgers/hotdogs on the mountain. Our favorite meals were the cheesesteaks that we made for lunch, parmesan crusted pork chops (Giada’s recipe) for dinner and the spaghetti bolognese (with arriabata sauce) that ended up being lunch AND dinner.. for me at least.

IMG_6213

Aside from the pounding headaches, our trip to Breck was fantastic. It snowed the whole time we were there, which some would consider a bad thing since that usually means low visibility. But to me, any snow is great.. I ain’t complaining! And its true, the snow in Colorado is different. The snow is really light and dry unlike the wetter snow in Southern California (due to the humidity). My only gripe about Breck is that there are 4 Peaks: Peak 7, 8, 9 and 10 and manuevering from peak to peak can be difficult at times. We tried to avoid that as much as possible by spending one day on Peaks 7 & 8 and another day on Peaks 9 & 10.  

I can’t wait to go back to Colorado and check out the other resorts, but I’m shooting for Utah next.